 Pin this
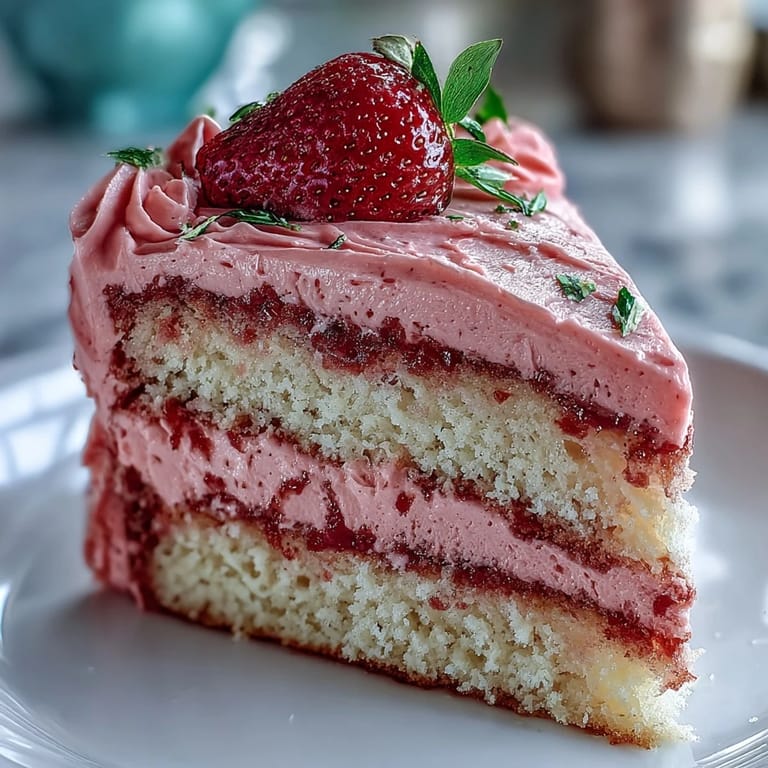
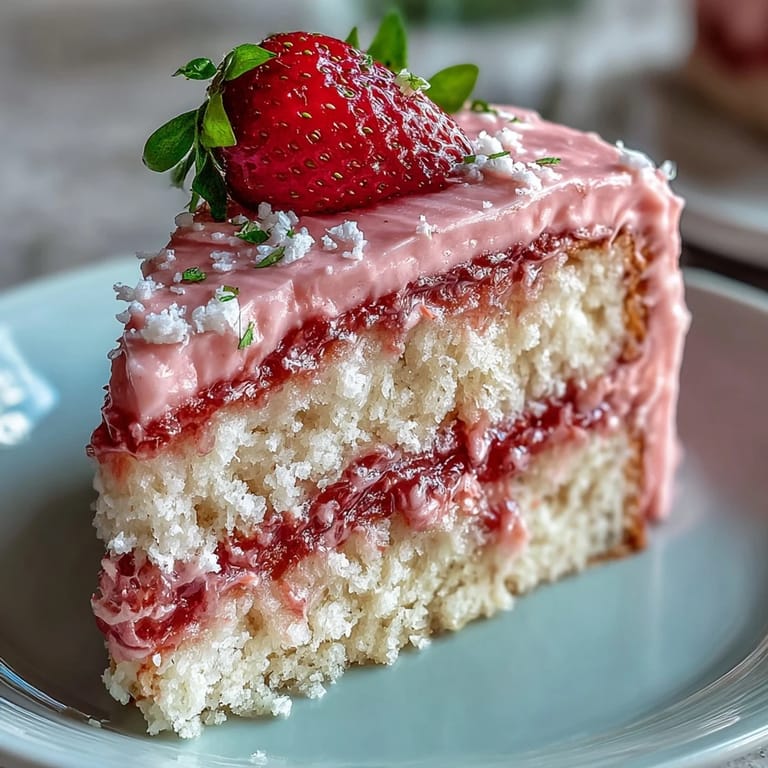
 My friend texted me a photo of a pink ombre cake she'd seen at a bakery, asking if I could recreate it for Valentine's Day. I stared at that image for way longer than necessary, imagining the strawberry buttercream layers and how the colors would fade from deep pink at the bottom to nearly white at the top. That afternoon, I found myself at the grocery store buying freeze-dried strawberries I'd never used before, excited in that specific way you get when you're about to attempt something that looks impossible but probably isn't. Three hours later, after a few spatula mishaps and one moment where I genuinely questioned my piping bag technique, this cake existed on my counter looking like it belonged in a magazine. Turns out, the secret was patience and not overthinking the ombre part.
I brought this cake to a small gathering where someone's elderly grandmother was visiting, and she went completely quiet when she saw it. Not in a disappointed way, but in that reverent way people go quiet when they see something genuinely beautiful. She had a slice and told me it reminded her of strawberry shortcakes her mother made in the seventies, except prettier and somehow more special because it was pink all the way through. That conversation stuck with me more than any compliment about the decoration, because it reminded me that a cake is really just an excuse to make someone feel celebrated.
Ingredients
- All-purpose flour (2 1/2 cups): The base of your cake structure; room-temperature ingredients mix better, but this especially matters for achieving an even crumb.
- Baking powder (2 1/2 tsp): This is what gives you that tender, airy cake that doesn't feel dense or heavy.
- Fine salt (1/2 tsp): A tiny amount that somehow makes strawberry taste more like strawberry and balances the sweetness.
- Unsalted butter (1 cup for cake, 1 cup for frosting): Room temperature is non-negotiable here; cold butter won't cream properly and you'll end up with a grainy texture.
- Granulated sugar (2 cups): The creaming process with butter is what creates that light, fluffy texture that makes each bite tender.
- Large eggs (4): They need to be room temperature so they incorporate smoothly and evenly into the batter.
- Pure vanilla extract (1 tbsp, plus 1 tsp for frosting): The pure stuff actually tastes like vanilla; imitation can taste off-putting if you use too much.
- Whole milk (1 cup): Alternate adding this with flour to keep your batter from becoming overmixed, which would toughen the cake.
- Powdered sugar, sifted (4 cups): Sifting removes lumps before you even start; trust me, you'll taste those lumps if you skip this step.
- Freeze-dried strawberries, ground (1/2 cup): These give you pure strawberry flavor without any added liquid that would throw off your frosting consistency.
- Heavy cream or milk (2 tbsp): Use this to adjust frosting thickness if your freeze-dried strawberries absorb more moisture than expected.
- Pink gel food coloring (optional): Gel won't thin your frosting like liquid coloring does; it's worth finding in the baking aisle.
Tired of Takeout? 🥡
Get 10 meals you can make faster than delivery arrives. Seriously.
One email. No spam. Unsubscribe anytime.
Instructions
- Get your mise en place ready:
- Preheat your oven to 350°F and grease three 8-inch round pans with parchment paper circles on the bottom. Pull out all your ingredients and arrange them where you can see them; this takes five minutes but saves you from discovering mid-bake that you forgot the vanilla.
- Combine the dry ingredients:
- Whisk flour, baking powder, and salt together in a medium bowl until well combined. This distributes the leavening evenly so your cake rises uniformly.
- Cream butter and sugar:
- Beat room-temperature butter and sugar on medium-high for about three minutes until the mixture looks pale, fluffy, and almost mousse-like. This is where the magic happens; if you rush this step, your cake won't have that tender crumb.
- Add eggs one at a time:
- Drop in each egg individually and beat well after each addition; if you add them all at once, the batter can look broken and separated. Once they're all in, add vanilla extract and beat until smooth.
- Alternate flour and milk:
- Add one-third of the flour mixture, mix until just combined, then add half the milk and mix again, then another third of flour, the remaining milk, and finally the last of the flour. Starting and ending with flour prevents overmixing and keeps your cake tender.
- Divide and bake:
- Pour batter evenly into the three prepared pans and smooth the tops slightly. Bake for 25 to 30 minutes until a toothpick comes out clean; the cakes will smell sweet and golden and will pull slightly from the sides of the pan.
- Cool the cakes:
- Let them sit in the pans for ten minutes, then turn them out onto wire racks and cool completely, which takes about an hour. This cooling step is crucial because warm cakes are fragile and will break apart if you frost them too soon.
- Make strawberry buttercream:
- Beat room-temperature butter until creamy, then gradually add sifted powdered sugar and ground freeze-dried strawberries, mixing until combined. Add cream, vanilla, and a pinch of salt, then beat until fluffy and smooth; this usually takes about two minutes total.
- Create the ombre effect:
- Divide buttercream into three bowls and leave the first plain, tint the second light pink, and the third deep pink using gel food coloring sparingly. Transfer each shade into a piping bag if you're doing detailed work, or use an offset spatula if you prefer a more organic blend.
- Level and assemble:
- Place your first cake layer on a serving plate, spread a thin layer of the lightest buttercream on top, add the second cake layer, spread with medium pink, add the third layer, and spread the top. The stacking is straightforward; the frosting holds everything together.
- Create the gradient frosting:
- Spread the darkest pink buttercream around the bottom third of the cake, medium pink in the middle third, and lightest pink on the top third. Use an offset spatula or cake scraper to gently blend where the colors meet, creating a soft transition rather than harsh lines.
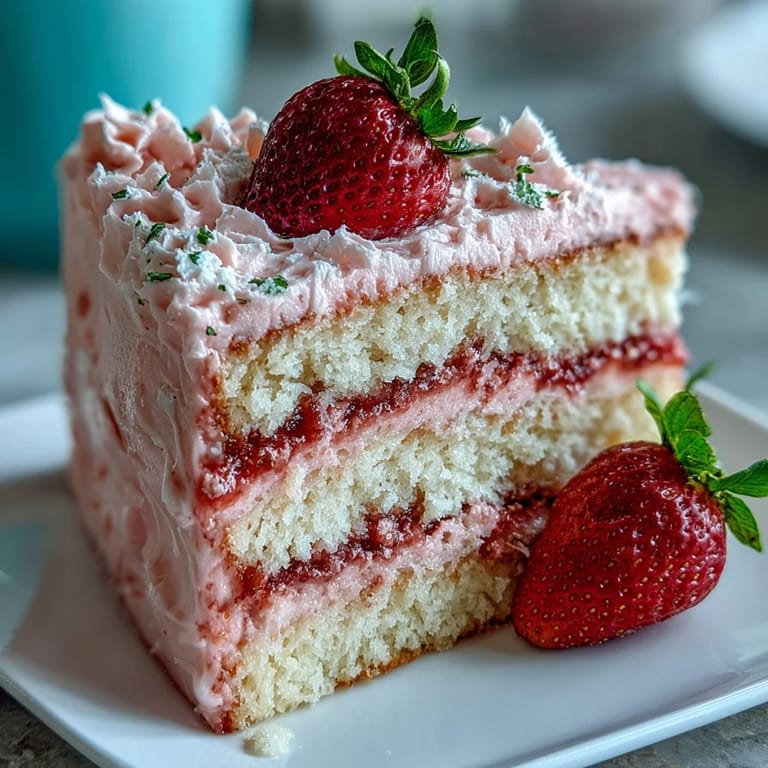
- Final garnish and chill:
- Top with fresh strawberries and edible glitter if desired, then chill for at least 30 minutes before slicing. This chill time helps the layers set and gives you clean, distinct layers when you cut.
 Pin this
 My neighbor borrowed this cake recipe to make for her daughter's birthday, and texted me a photo of her daughter's face when she saw it on the table. That moment, that pure joy when a cake is beautiful and tastes even better than it looks, is exactly why this recipe matters to me. It's become the cake I make when I want to tell someone they're worth the small effort it takes to make something intentional.
Making This Cake Ahead
The best part about this recipe is how forgiving it is for advance preparation. Bake your cake layers up to a month ahead and freeze them wrapped in plastic wrap and aluminum foil; they'll keep their moisture and structure perfectly. Thaw them at room temperature for about an hour before frosting, and they'll taste just as tender as freshly baked layers. I've done this dozens of times for parties, and honestly, the slight settling that happens during freezing actually creates more tender crumbs.
Understanding Freeze-Dried Strawberries
Freeze-dried strawberries changed how I think about fruit flavoring in baked goods, because they give you actual strawberry taste without any of the moisture problems that fresh strawberries bring. When you grind them into powder, they distribute evenly through frosting and disappear into a silky pink frosting that tastes purely of strawberry, not of sugar and disappointment. The flavor is concentrated and bright, so you use less than you would with fresh fruit, and your frosting stays the perfect consistency for piping and spreading.
Troubleshooting Your Ombre Effect
The ombre frosting looks scarier than it actually is, and honestly, if your blending isn't perfect, it still looks intentional and beautiful. The key is using an offset spatula or cake scraper to gently feather where colors meet rather than trying to create sharp lines. If your frosting is too stiff, it won't blend; if it's too soft, the colors will muddy together, so you want it thick enough to hold shape but soft enough to spread smoothly.
- Use gel food coloring because it won't thin your frosting the way liquid coloring does.
- Do a test blend on parchment paper first if you're nervous about the gradient effect.
- Remember that imperfection actually looks more modern and handmade than a perfect gradient.
 Pin this
 This cake has become the dessert I reach for when I want to celebrate someone or mark a moment as special. It's proof that you don't need to be a trained baker to create something genuinely beautiful and delicious.
Recipe FAQs
- → What ingredient gives the buttercream its strawberry flavor?
Freeze-dried strawberries, finely ground, provide a natural and intense strawberry taste to the buttercream.
- → How is the pink ombre effect achieved on the frosting?
Different portions of buttercream are tinted with pink gel food coloring in varying shades and applied in layers from darkest to lightest.
- → Can the cake layers be prepared in advance?
Yes, cake layers can be baked ahead and frozen for up to one month before assembly.
- → What tools are needed for assembling the cake?
Common tools include piping bags, an offset spatula, a cake scraper, and round cake pans.
- → Is this suitable for vegetarians?
Yes, the ingredients used do not include meat or gelatin, fitting a vegetarian diet.
- → What is a good pairing to serve alongside this cake?
A sparkling rosé or a light fruity cocktail complements the cake's flavors well.